Thursday, December 23, 2010

Warm Holiday Greetings

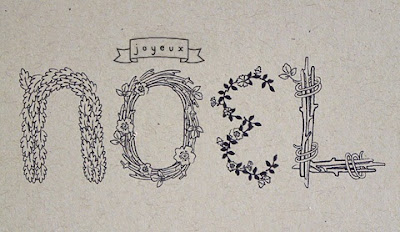
I've been wanting to share my holiday cards here, but decided to wait long enough for everyone to receive them in their mailbox first. This morning I uploaded all the pics, planning to write the post later in the day. I realized the post was meant to be today because a) it's actually WARM and sunny here today, so it truly is a Warm Holiday Greeting and b) many other of the blogs I follow also shared their holiday card today!

My only real plan for making holiday cards this year was to use materials I had on hand, which included a large pack of festive holiday paper. I saw these cute cards ideas from Paper Source and was planning to use them as inspiration. 

Over Thanksgiving we took this nice photo in Laguna Beach and I got to thinking...why not use the photo for our cards. I mean, who wouldn't want to see B and I arrive in their mailbox? :) 

While there are many wonderful websites that will produce beautiful photo cards, I still wanted to make the cards myself (need to use up that holiday paper!). Using Picasa I added the Warm Holiday Greetings as seen below. In less than an hour Wallgreens had my photos ready for pick-up! 

I mounted the pictures on dark brown cardstock. Using my cherry Divine Twine (I know, I am obsessed with it) I wrapped the photos to look like a package. 


Using 12x12 sheets of holiday paper, I cut a festive base for the card. I attached the holiday paper to a flat piece of Kraft paper.


With scraps from the paper above, I made coordinated envelopes! 


I attached the two pieces of paper together, added labels and stamps to the envelopes and viola - a Warm Holiday Greeting from our house to yours! I'm really happy with how the cards turned out and have received so many sweet comments from friends and family. 


I wanted to make something smaller but similar for a few of my co-workers. Here is what I came up with...


While I truly enjoy making and mailing holiday cards, there is nothing I love more than coming home to holiday mail. Our Happy Holidays garland is filling up nicely!


Here are a few of the presents I wrapped last night. Cute tags, eh? I decided to use simple paper this year (it's actually packaging paper from CVS) with the tags I made and festive ribbon. Easy breasy. Now hoping they all travel well on the airplane! 


Tonight we're off to Colorado! I am SO EXCITED to be home for the holidays!! 

Wednesday, December 22, 2010

Not your mother's craft fair


Over the weekend Rachel and I went to the Renegade Craft Fair in San Francisco. The weather threatened to rain on our parade (forecast: heavy rain and wind - yuck), but thankfully it only sprinkled making the day just perfect. 

I didn't know exactly what to expect at the craft fair, I just had a really good feeling it would be RAD.  When we were in Chicago for Emily & Ryan's wedding I stopped by the actual store Renegade Handmade and while it was cool, I was expecting more. That's when I realized there are bi-annual Renegade Craft Fairs across the country. I confirmed on Saturday - this in fact is what the hype is all about. We settled on two statements to describe it: not your mother's craft fair and a live version of Etsy

I purchased a few gifts, which are surprises so I can't share here. But I will offer you a glimpse of the fair...
{renegade blog}
After browsing every aisle I was left with a lot of appreciation for the time, effort and talent of the vendors. I saw a lots of letter press goods (which really makes me want to take a class), mustaches are apparently really popular and tons of vendors had their company name on a bunting paper (yay!). I also was really curious to know if all these vendors have real jobs like me or do they get to craft all day long (jealous!)

I didn't have a chance to get cash before the show and was delighted to see almost all of the vendors took cards. One of which had a card swiping device attached to her iphone - ahh technology! 

If you ever have a chance to check out a Renegade craft fair DO IT. Need someone to tag along? Call me! 

28 (a little bit late)

Rachel sporting her birthday crown!
At the beginning of December the lovely Mrs Rachel turned the big 2-8. Another year older, wiser and just as beautiful. On the eve of her birthday a group of us celebrated at the Burger Bar in Union Square. 

For Rachel's birthday I wanted to make her a set of cards. When I lived at her house I was always making cards, including this set of 30 for Kaci, and she mentioned how she'd love to order some. I made a mental note of that and decided her birthday was the perfect opportunity. In honor of her birthday I settled on a set of 28 cards. 

Unfortunately I didn't have them done for her actual birthday celebration, so I made it my goal to give them to her at the Gingerbread party. I am happy to report I did it! And here are a few of my favorite cards from the bunch (appropriately displayed in a 2 and an 8!)


I put all of the cards and their envelopes in the pillow box I made with my Paper Source wall calendar (as seen here). Tied it up with a bow and added a small matching card.


Even though they were a little late, I know she greatly appreciated the cards, as she's already expressed her gratitude. It just goes to show...good things come to those who wait, even when you're 28! 

I have a good feeling about the year ahead for you, Rachel! And I'm happy we are the same age again (wink).

Gingerbread Village

On Monday night Rachel hosted a Gingerbread, candy and wine party. In other words...a group of ladies gather at Rachel's, each bring a bottle of wine or appetizer, two bags of candy and we all make gingerbread houses while indulging on wine, apps and the candy! 

The result was an eclectic village of nine houses,  over-consumption candy but an all around good time! Welcome to our Gingerbread Village...


The mound of candy and frosting used to build the village

And the most fun part, an up-close photo of the houses and my favorite part about each one!

Look at the roof on this house - each tile was cute out of Twizzler's pull-n-peel. Favorite feature: the melted snowman in the yard!


Welcome to my elf hut. I'm sure it's really cute and cozy inside, which is good since the outside leave a bit to be desired! Favorite feature: sour patch lawn with a corner garden. 

Do you have a stomach ache from eating too much candy? Have no fear: we're at the hospital! After making a window that looked like a sign for an emergency room, Ariane decided to make her house a hospital. Favorite feature: the ambulance on the sprinkle filled street. 


The house on the block everyone envies - look at that immaculate lawn and perfect path way! Favorite feature: chocolate pretzel lined roof. 

As you can probably tell, this is the Architect of the group: perfectly spaced bushes, fences and look at that curved pathway! Favorite feature: the perfect sprinkle tile roof. Need a professional, for your real or gingerbread house, you know who to call!

Maybe I'm biased because Molly was sitting right next to me, but I think her house turned out super cute! Peppermint fence, gum drop lined path and those chocolate pretzels for the roof. Favorite feature: turning a (tree shaped) sugar cookie into a large yard tree. 

My other neighbor (while decorating) sure is handy with the frosting! In no time at all she had a Smartee roof, mint chip lawn and pretzel fence. Favorite feature: trees in the yard. Holding that front tree up is a roll of Smartees - clever!

Last but certainly not least, the A frame at the end of the street! Elana made the most of her lawn space by creating several lawn ornaments. A festive, wide path leads you to my favorite feature: the cute red door with a sprinkle door knob. 
(i'm a sucker for red doors and little details)

That wraps up our Gingerbread Village tour of homes! To continue the holiday creativity we're planning a Valentine's cookie, card and wine (of course) gathering. 

Ashlee, Debbie and Sarah - you were all missed! 

Friday, December 17, 2010

T.I.Y. - Tag It Yourself!

Looking for an easy and super affordable way to add a little handmade goodness to your holidays? I suggest you T.I.Y. - tag it yourself!

There are so many fabulous FREE gift tag templates (all you have to do is download and print) I'm not sure why you'd wouldn't TIY! Here are some of my favorites, followed by the ones I'm using this year. All tags can be found by following the links under each photo! 


{eat drink chic}

{orange you lucky}


{going home to roost}

{the paper cupcake as seen on party like a kid}


{belvedere designs}


{amy butler}

Using this free download from Heather at We Met in a Bar, I printed a few sheets of the gift tags. I then cut them out and glued them onto holiday paper. The first set are backed with festive paper.

This second set I used solid colors and patterns. 

I love all of them and can't wait to attach them to gifts. It's hard to tell the size in these pictures...they're approx 2x4 inch, plenty of room to write to & from!

Still want MORE? Check out the Inspired Honey Bee's favorite freebies round up from last week

I would like to extend a huge thank you to the designers and creative people out there who share their talents with others - you rock! If you (dear blog readers) use any of these free tags, please give credit where credits due. Leave a comment on their page or a shout out on your blog. 

Thursday, December 16, 2010

Welcome to the 'hood!

One of my co-workers is moving across the bay this weekend - from San Francisco to Oakland. Not only are she and her hubby moving into a newer, bigger place, they're also expecting their first baby (her due date is actually within a day of Melissa's)!

I've been wanting to get them a little congratulations something-or-other and was thrilled when I found this adorable onesie in a cute kids boutique on Piedmont Ave.

Not only do they have adorable gear for tots, they also put it in a cute box with a ribbon. I added a little congratulations card and ta-da a lovely little welcome to the (neighbor)hood gift!

More info on Crackerjacks here

Holiday Wreath Round-Up

Here are a few of my favorite holiday wreaths from around the web. I LOVE the handmade quality of these. And as you can see, I'm completely drawn to the red and green this year!

{handmade colectibles}

{william sonoma}

{paper source}

{martha stewart}

 If money and time weren't an issue I think I would have tackled something a little more creative than what I came up with. In the end, I knew I wanted a real evergreen wreath (for the glorious smell) that I could spruce (pun intended) up a bit. 

I bought an evergreen wreath from TJ's for a ridiculously low price. Before I was able to decide how to spruce it up, It just sat in our hallway so we could enjoy the smell. 

To decorate, I headed to Michael's and settled on some silver ribbon and two sets of berry garlands. I cut one of the strands into several pieces and simply poked them into the wreath. For the most part they've stayed in place without any glue. This also means after the holidays I can pull the berries out and keep them for next year. 

I know it looks a little (or very) plain, but I decided to keep is real simple this year! I hung this on the door in our living room. Although we have to sweep up a lot of needles, I am so happy to have a real wreath! 

With the second strand of berries, I made another smaller and also very simple wreath. This cutie is hanging in our bedroom. 

Wednesday, December 15, 2010

I heart the Trader Joe's Cookbook

I received this cookbook from Rachel for my birthday. I know, my birthday was a while ago, but I have finally had time to use this sucker. True to its title, I truly heart the Trader's Joe Cookbook! 
{image via}


As I mentioned when I shared my list of favorites/go-to items from TJ's, it took me a while to truly navigate the store. There are so many unique items, I'm just not always sure how to prepare them. Thank goodness for the I heart Trader Joe's Cookbook because it makes meals out of items that can all be found at TJ's. The recipes are also very simple and have a 75% success rate in our house (unsuccessful =  the southern greens pasta. A for effort)


Here is a sneak peak inside the cookbook and my favorite recipe (so far): 


Don't have a TJ's nearby? You could improvise most of the ingredients. 


10 days until Christmas...not too late to add this to your wish list or pick it up for the TJ's lover in your life!

Holiday Card Garland

Since we're not getting a Christmas tree this year, I've been working on a few things to make our apartment still feel festive. One of the easiest ways to decorate is using holiday cards. While we've only received 2 so far, I still wanted to get something put up for when the cards start to really roll in (kidding!).

I saw this simple card garland and LOVED it! Sadly, we don't have a mantel, but we do have plenty of wall space. 
{apartment therapy}

I also saw this cute cloths line garland and thought of my decorative cloths pins
{Real Simple}

With inspiration from the photos above, help from Debbie and her Cricut and supplies I had at home, I made this lovely holiday card garland! It's hanging on the wall of our entry way/landing so we can see the cards often!


Using letters Debbie cut for me, I strung them on a piece of cherry twine + hemp cord. I made a second longer piece of cord for the actual cards. I used my favorites of the decorative cloths pins to clip cards on the line.


What you can't see in the pictures above is an important, and cute, detail. I tied the card line off with a bow. This is so I can make the line longer should we need more room for cards. As you can see, both lines are taped to the wall. 


I will share a few more holiday decorations later this week. Hope your holidays are shaping up festively as well!


P.S. I apologize for the horrible photo color quality. The garland is hung in a dark area so I had to use ugly overhead light. It's cuter in natural light, so that just means you all should come see it in person :) 

Thursday, December 9, 2010

Desert Delight

Over the weekend I took a trip to Arizona to visit one of the states newest residents, a true desert delight, Melissa! I shared here about moving to AZ to follow her Hart. 

I had never been to Arizona so I didn't really know what to expect. I was surprised by how big the mountains are and completely intrigued by the saguaro cactus! They are so cool and if you are crazy like me, you start thinking the cactus look like people giving a low-five, or two cacti hugging (yep, crazy!). While I still prefer trees to cacti and grass to sand, I really enjoyed Arizona. 

Of course, I was most excited to see Melissa and ....her bebe bump! She and Mr Hart are expecting their first bebe in May. I was happy to meet Parker (aka Mr Hart), see their new home and desert lifestyle.

Speaking of which, here are a few pics of the outside of their home: 

Parker (circa 1996) +  Melissa = love

On Sunday we took a drive north to Sedona. It was beautiful! Parker took us on a private Jeep tour up into the hills, which was fun and really bumpy. 

While in Sedona we also took a little hike. 
Sadly this is the only picture we took together the whole weekend.

I also got to meet Parker's best friend, Dylan!

And what everyone really wants to see...Melissa and her bebe bump!

Although they're still deciding on room themes, I wanted to make them a Baby Hart Bunting Banner to get the decorating party started! They aren't finding out bebe's gender until birth so the potential (neutral) themes are: jungle, turtles or rock star. Regardless of the room theme, there is no doubt Baby Hart will be spoiled rotten with love! I am so excited for M&P and their bebe!

Thanks to M&P for hosting me for the weekend!