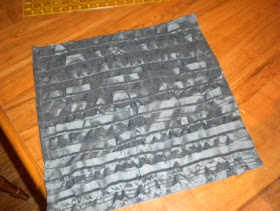
Today is my second guest post this week written by
Jen! Jen is a Meeting Planner and has been the primary person to train
me in my new role. I shadowed her the entire week at the conference and
we traveled together to Boston, Miami and Tampa for site visits. I feel
so lucky to be learning from her, as she is amazing at her job. In addition to all the work and travel time we've spent together she also includes me in social
activities. In short: she rocks and I'm grateful! Thank you for sharing
your project, Jen!
Having
totally fallen in love with the diy ruffled pillow I
knew it was exactly what I wanted to create when I was challenged to actually
follow up on a pin and create something myself! Since the original pin only
included a series of pictures for instructions I hit the web to find some
additional instructions and landed on ruffle pillow
{by Jess} from Floral Showers. I combined the two with my ultimate vision
and created exactly what I wanted.
The tutorial suggested using an extra large t-shirt and
stuffing, instead I purchased one yard of beautiful blue/gray striped taffeta
and two 16” x 16” pillow forms.
Step 1: Slice that fabric
Taffeta has a tendency to fray, and since I was concerned
with the inside seams of the pillow falling apart I decided that I would sew
French seams for all my interior seams. Since French seams would need more seam
allowance I cut the front of my pillow at 17” x 17” and wanting the back of the
pillow to be an envelope, I cut two back pieces that would overlap, 12” x 17”
and 9” x 17”. My rotary cutter made it extremely easy to slice nine 1.75” x 25”
strips which would become the ruffles. The ruffle strips need to be cut
considerably longer than the final pillow size as they will become shorter once
ruffled.
Step 2: Sew those ruffles
To create the ruffles I sewed a basting stitch (long stitch)
down the center of each strip. I then laid each strip on the pillow front and
tacked them down by sewing ¼” seam through the top of each strip.
Begin to ruffle!
This
was the best part of the project! To create the ruffles I simply pulled the
bobbin thread causing the strips to scrunch up until they were 17” long (be
sure to hold the threads at the opposite end from where your pulling and don’t
pull too hard). I then went back to the sewing machine and sewed each of the
strips down their center onto the front of the pillow. If your original basting
seam is showing you can easily pull the threads out, making the pillow top look
cleaner.
To
complete my ruffle pillow I laid the two back pieces of the pillow so that they
overlapped (to create the envelope) and then laid the ruffled top on top of
them so that the wrong sides of the fabric were against each other. I then
sewed the front to the back around the perimeter using ¼” seam allowance, be
sure not to sew the ruffles down (Part 1 of the French seam). I then turned the
pillow inside out and again sewed around the perimeter of the pillow using ¼”
seam allowance (Part 2 of the French seam). Once again I turned the pillow
right side out and I had a ruffled pillow cover! To finish I just put the
pillow forms into the pillow cover using the envelope opening in the back.


No comments:
Post a Comment